

In some projects, there might be many scheduler-based applications, and the testing team from either source or target systems doesn’t have access to the Anypoint platform to run schedulers whenever required; thus, having to rely on MuleSoft developers to run the schedulers for them. In this article, you will learn how to create a simple web page using HTML for fetching the user’s input and use CloudHub APIs to run the schedulers based on the user’s inputs provided.
This will save a lot of time for the testing team to test the integration in the lower environments. I would recommend not using this for testing in production as if someone misuses it by running the schedulers more frequently, then integration might break.
Implementation
Step 1
Go to Anypoint platform and create a Connected App in Access Management for using CloudHub APIs. Limit the scope of the Connected App to Runtime Manager only. You can go through this MuleSoft document to learn how to create a Connected App in Access Management.
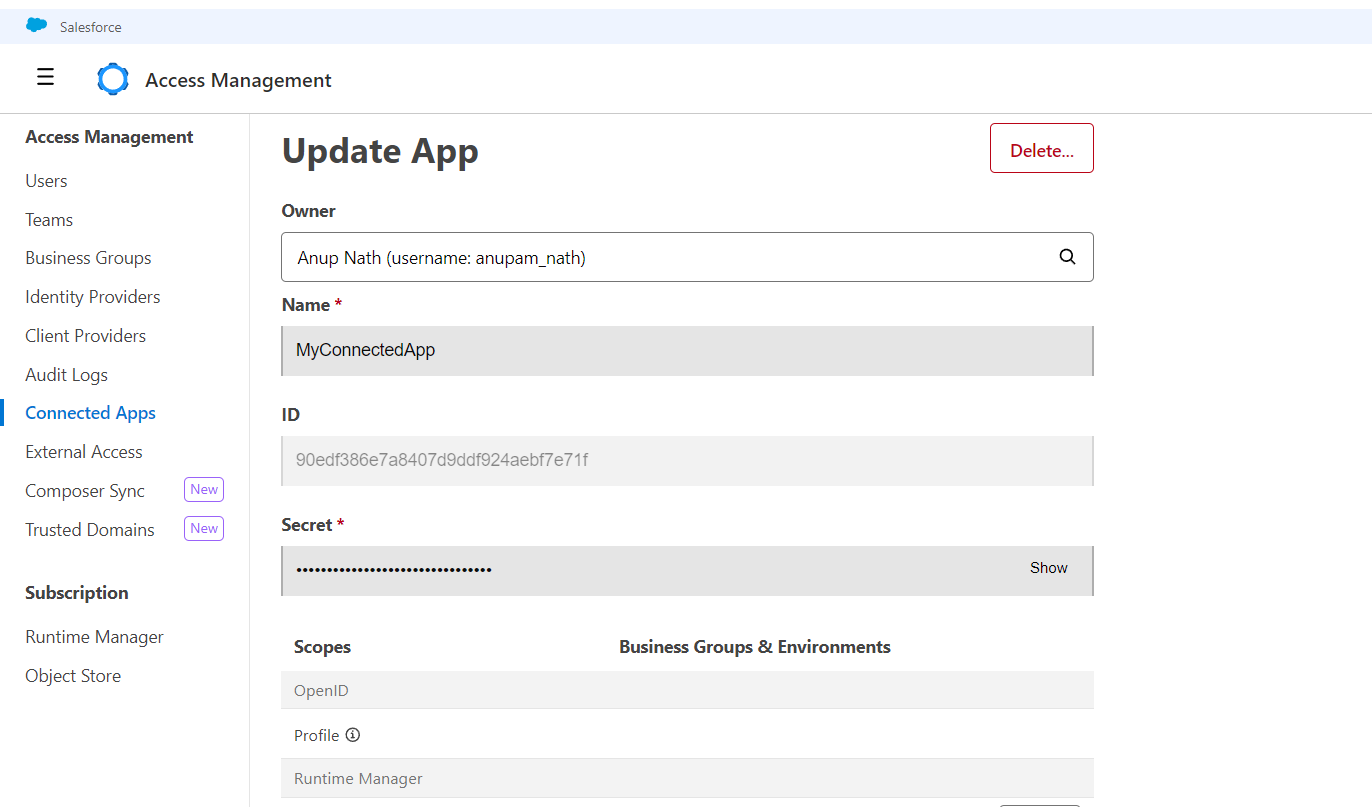
Copy the Client ID and Secret, which will be used for fetching the access_token to authenticate requests for CloudHub APIs.
Step 2
Create a new Mule application in Anypoint Studio and create the following HTML files inside src/main/resources:
- applications.html
- homepage.html
- invalidCredentials.html
- notfound.html
- schedulers.html
- signin.html
- thankyou.html
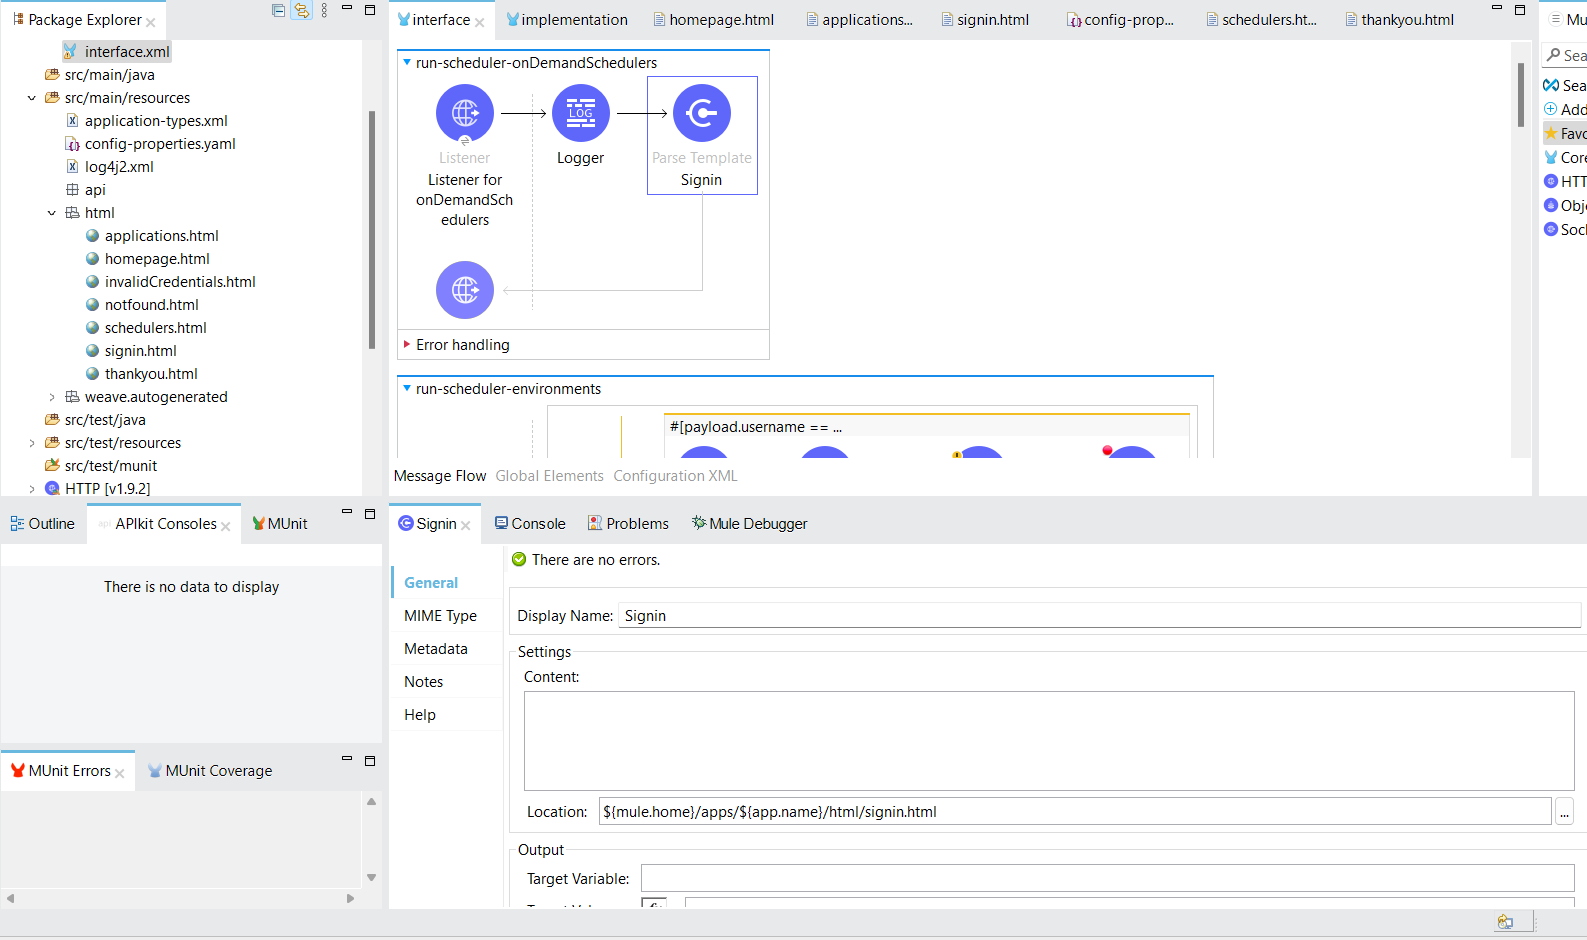
First, create the flow as shown below. This is the entry point of the application which will open the Signin web page using the Parse Template component.
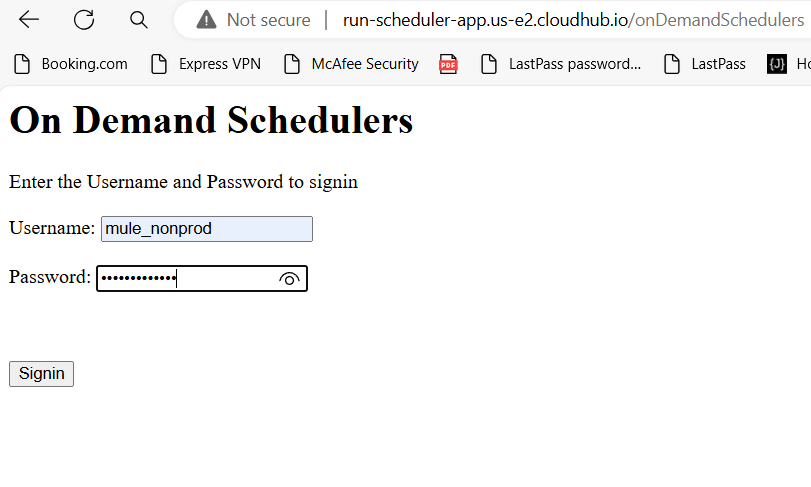
signin.html
<html>

<body>
<h1>On Demand Schedulers</h1>

 <form action="http://run-scheduler-app.us-e2.cloudhub.io/environments" method="POST" >

 <!-- for running in local <form action="http://localhost:8081/environments" method="POST"> -->

  <label for="environment">Enter the Username and Password to signin</label>

  <br><br>

  <label for="username">Username:  </label>
  <input type="text" id="username" name="username"><br><br>
  <label for="password">Password:  </label>
  <input type="password" id="password" name="password"><br><br>

  <br><br>

  <input type="submit" value="Signin">

</form>

</body>

</html>
In the above HTML, the form tag’s action attribute should call the endpoint of the mule flow “run-scheduler-environments” (listening to the endpoint /environments) as shown in the Mule image below. The method should be POST so that the credentials do not get displayed in the URL.
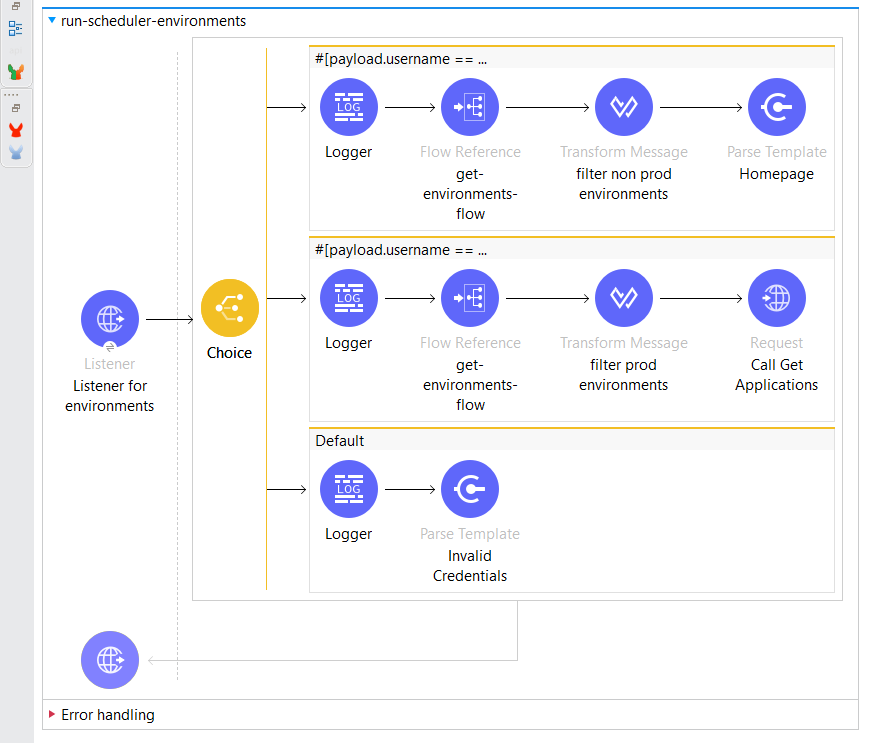
 On the web page above, you will have to enter the username and password for the non-prod/prod environment in which you want to run the scheduler. The credentials for non-prod and prod environments are managed in the properties file. The Mule flow, as shown below, will validate the credentials and proceed further to get the environment details. If the credentials are invalid, then it won’t proceed further, and you will get an error message.
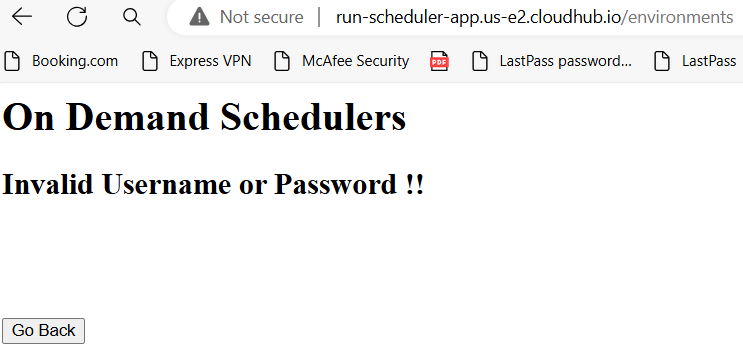
invalidCredentials.html
<html>

<body>
<h1>On Demand Schedulers</h1>

<h2>Invalid Username or Password !!</h2>

<br><br>
 <form action="http://run-scheduler-app.us-e2.cloudhub.io/onDemandSchedulers">
   <br><br>
   <input type="submit" value="Go Back">
 </form>
</body>

</html>
Here, in the above HTML, the form tag’s action attribute should call the Mule flow “run-scheduler-onDemandSchedulers,” listening to the endpoint /onDemandSchedulers. If you click on the Go Back button, it will take you to the sign-in page again.
Step 3
To send a request to CloudHub APIs, you must generate the access token by using the following curl:
curl --location 'https://anypoint.mulesoft.com/accounts/api/v2/oauth2/token' \
--header 'Content-type: application/json' \
--data '{
    "client_id": "{{client_id}}",
    "client_secret": "{{client_secret}}",
    "grant_type": "client_credentials"
}
Here, the client_id and secrets need to be passed from Step 1. The response that you will get is shown below. Store the access_token in the object store and set the Entry TTL property to 3600 (same as the expires_in property in the response). This will ensure that the key expires after 3600 seconds. 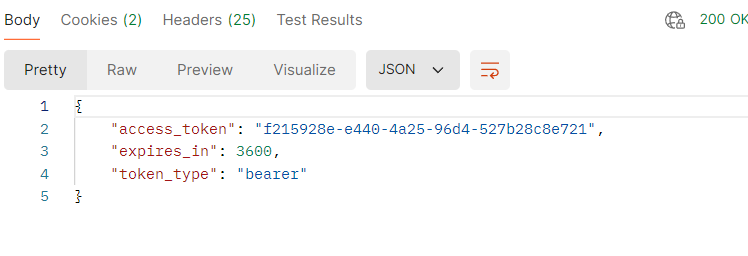
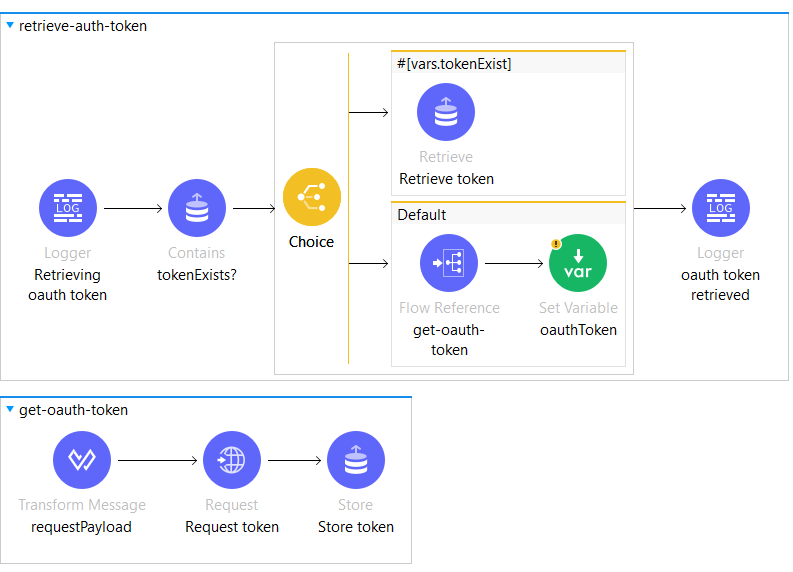
Implement the above logic in the Mule flow as shown below.
Step 4
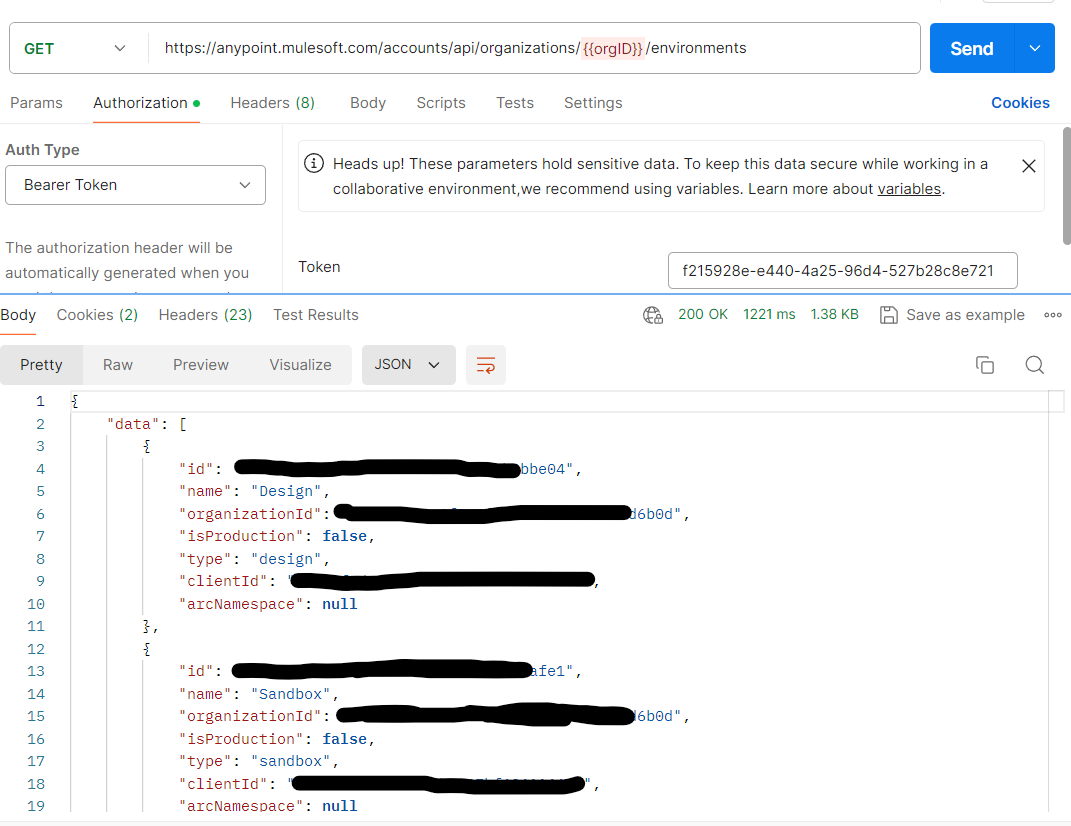
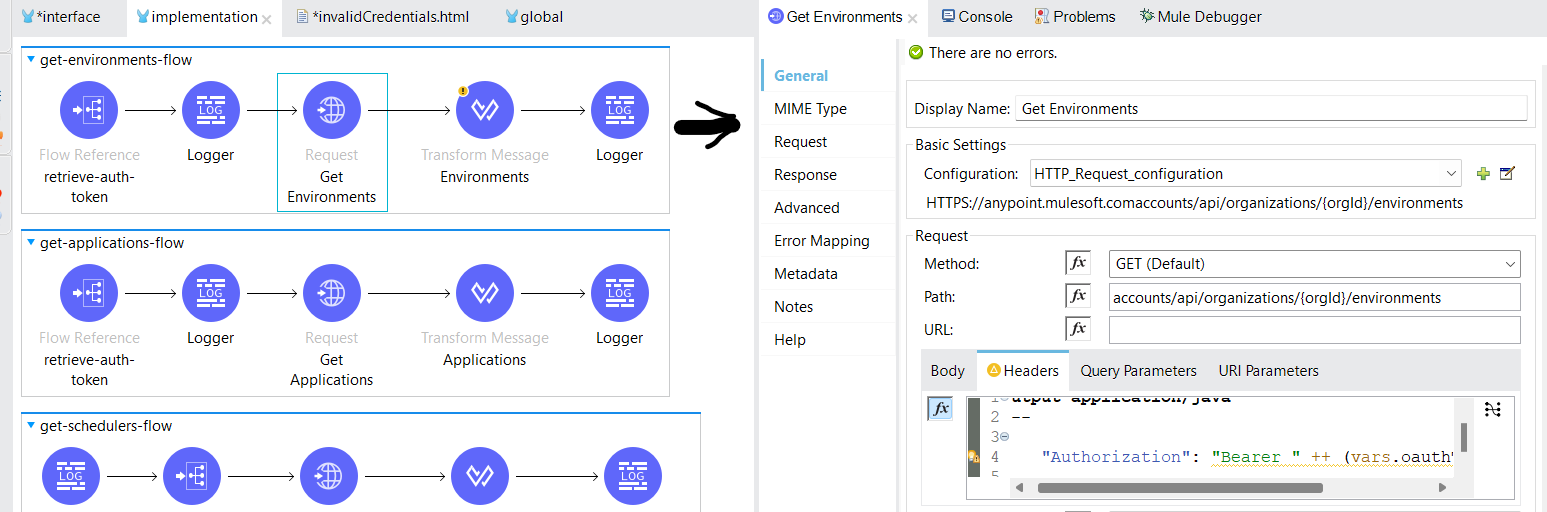
After credentials are validated on the Sign-in page, you need to call the endpoint (https://anypoint.mulesoft.com/accounts/api/organizations/{{orgID}}/environments) to get the list of environments. You will get the response as shown below. You will get the organization ID in the URL of the Anypoint Platform Home Page.
Implement the above logic using Mule as shown below.
Step 5
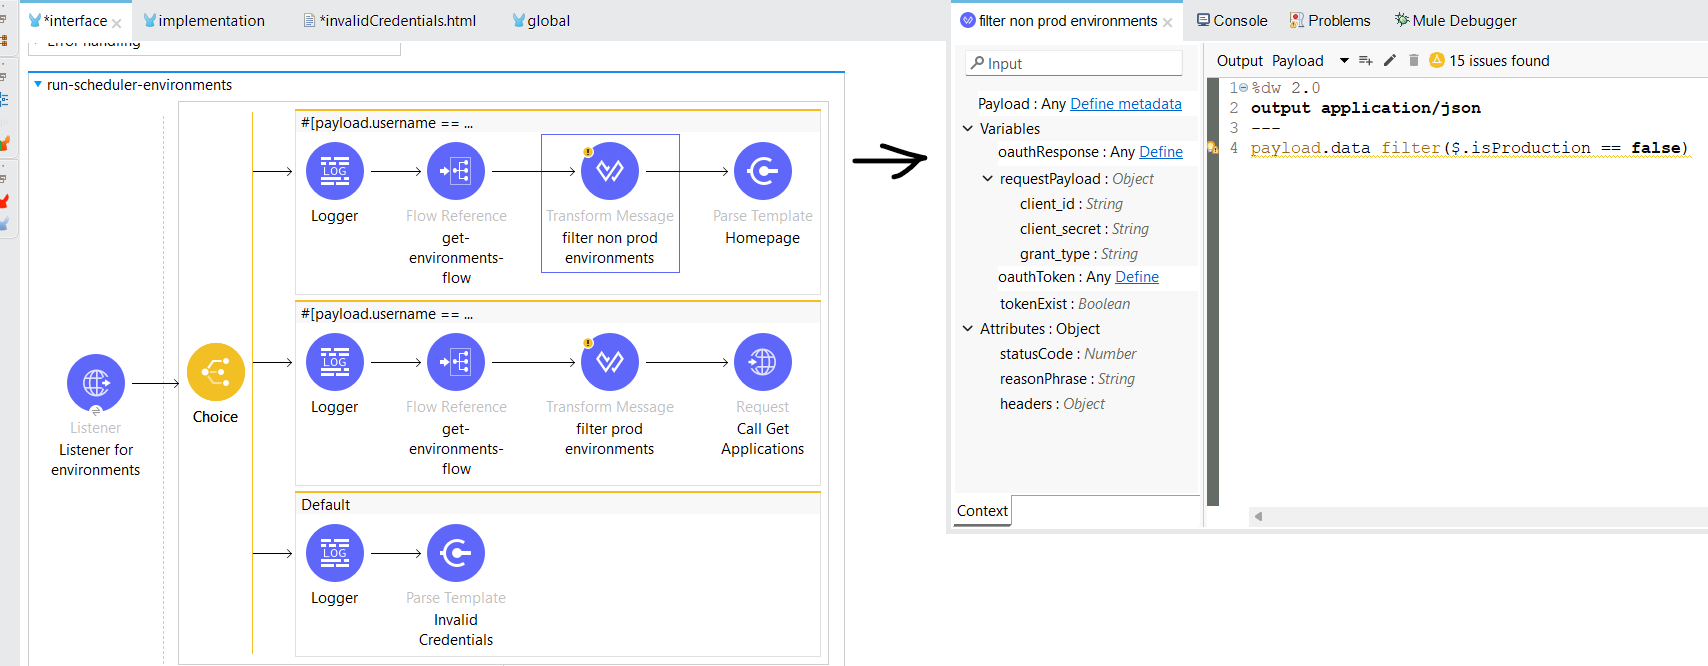
Non-Prod Environments
When the user signs in with non-prod environment credentials, the non-prod environment names and IDs are filtered out of the payload, and the values are passed to the homepage.html.


