

I spent over 200 hours researching how to make fluffy grass that I used in my project Elysium. I wanted to use a technique that was simple, but extremely effective and performant enough to run on older devices.
In this detailed article, I will breakdown all of the techniques used and explain how I made The Fluffiest Grass on the Web!
Table of Contents
- Creating a Terrain
- Popular Techniques for Creating Grass
- Tiled Grass Textures
- Alpha Cards/Billboard Grass
- Individual Grass Blades
- Creating Billboard Grass
- Creating Grass Mesh
- Instancing
- Chunking
- LODs
- Enhancing Visual Appeal
- Fake Ambient Occlusion
- Color Variation
- Animation
- Lighting and Shadows
- Video Tutorials
- Conclusion
Creating a Terrain
First, I created a terrain in blender by sculpting a plane mesh. I subdivided the plane until it had enough detail. In this stage, the more vertices we have the better the results will be. Using the Sculpting tools in Blender, I carved out my islands.

Then, I used the decimate modifier to selectively reduce the vertex count in low detail areas. This results in a mesh that looks the same as the original, but the vertex count is drastically reduced. This is one of my favourite techniques to optimize models for the web. Now onto the interesting part- creating grass.
Popular Grass Rendering Techniques
These are the most popular techniques used to render grass:
1. Tiled Grass Textures
This is the simplest method: applying diffuse and normal map textures directly onto the terrain. It’s fast but looks flat. Many older games like The Legend of Zelda: Ocarina of Time used this method. Developers mapped a flat grass texture onto the terrain, relying on artistic shading to mimic grass. Similarly, in low-poly games or mobile games such as Stardew Valley, tiling textures are still the go-to method for maintaining performance on less powerful hardware while delivering a stylized aesthetic.

2. Alpha Cards/Billboard Grass
Alpha textures are used to cut out the shape of grass blades on simple plane meshes. This method offers better depth and realism while keeping the poly count low. This technique is ideal for rendering vast fields of grass without a performance hit. By applying textures with transparency to flat planes, developers can simulate dense vegetation that reacts to lighting and movement. This approach strikes a balance between visual quality and rendering efficiency. This is the technique that we will be exploring in this tutorial.

3. Individual Grass Blades
Each blade of grass is modeled and instanced. While this provides the most realism, it’s computationally expensive. Games like Ghost of Tsushima showcase the beauty of this method, with every blade of grass reacting dynamically to wind and player movement, creating a deeply immersive environment. However, this realism comes at a high computational cost, making it less viable for web-based projects or applications targeting lower-end devices.

Creating Billboard Grass
Welcome to the fascinating world of Billboard Grass. In this technique, an alpha texture is used to cut out a plane, to look like grass. Two or more such intersecting planes are used to form a clump of grass that looks convincing from all directions, except when viewed directly from above. It looks like a criss-cross mess. While this is a viable option, and it is fast, I wanted to see if there was any way to mitigate this issue.
Increasing the density of grass would not solve the criss cross issue. Therefore, I came up with an idea to increase the number of planes and to rotate all of them such that the grass would still be visible when viewed from above. Turns out that I was not the first person to come up with the idea.😅

With this technique implemented, the grass mesh looks good when viewed from any angle. Things were staring to look promising. I now had the perfect grass mesh.
Instancing
Naively increasing the number of meshes in the scene will lead to more draw calls, with each grass mesh taking up a single draw call. 1000 grass meshes = 1000 draw calls. Unacceptable! The solution is to use instancing! I created an instanced mesh and scattered grass instances in my scene. However, when we increase the number of instances, the fps begins to drop. We hit a roadblock even before reaching 500k grass instances.
Chunking
At this stage, the scene was rendering millions of triangles in a single draw call, which is not ideal. The number of draw calls in not the only factor that determines performance. I had to reduce the poly count in the scene at the expense of a few additional draw calls. One way to do that is to take advantage of the automatic Frustum Culling feature in threejs. Frustum culling is the process by which objects that are outside the camera’s view (frustum) are not rendered.

To make use of this feature, I divided the world into chunks and then I created grass instances within each chunk. In other words, each chunk now has its own InstancedMesh. I divided my terrain into equal parts and created 16*16 = 256 chunks (this can be changed based on the size of terrain and performance). Even though the draw calls were up, the total number of polygons in the scene was now less than 70-80% of our previous step. 1 million grass instances was now possible! But, the grass looked sparse on the terrain, and I was hungry for some lush grass.
Now, I could practically render millions of grass instances on my MacBook. When building for the web, one must consider the different devices that users will have. Running a web based 3D application on a flagship device is no flex. I wanted this run on my intel i3 laptop from 2018. To render more grass, Frustum Culling alone was not going to cut it. I needed something more.
Level Of Detail (LOD)
This is the final step in the optimization process. We can reduce the poly count of the grass blades that are farther away from the camera by using a grass geometry with lesser vertices. Since this is far from the camera, the difference is barely noticeable, if at all.
This is called Level of Detail (LOD) and is a common technique used in video games to improve performance. The LOD system works by rendering the grass at a lower resolution when the camera is far away. When the camera gets closer, the grass is rendered at a higher resolution. This is a common technique used in video games to improve performance. In my case, I applied LOD per chunk with 3 levels of detail.

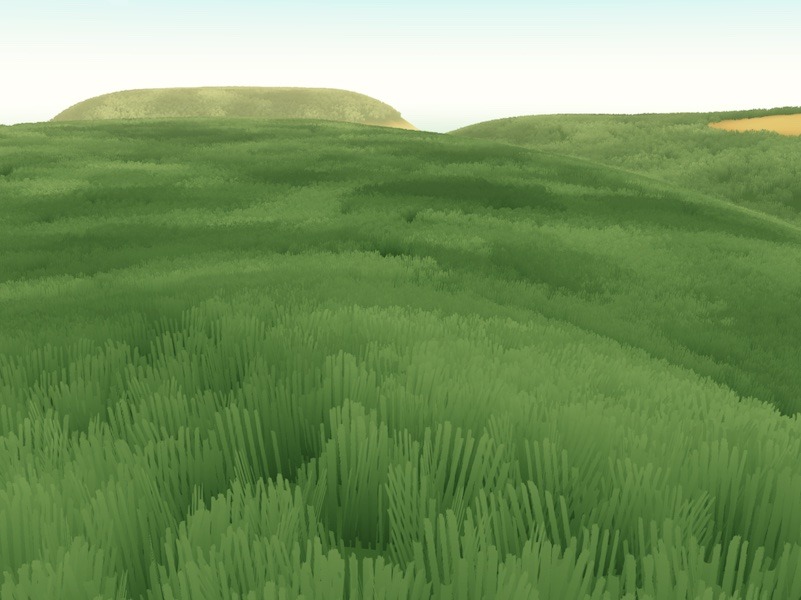
Grass is grass and grass is small. You can’t see individual blades of grass unless you are close enough. Similarly in our scene, grass that is farther away occupies less space on the screen (a few pixels). We can save precious draw calls on rendering a few pixels by not choosing to render grass beyond a certain distance from the camera. This is where, adding fog to the scene and matching the terrain to the color of the grass can do wonders in hiding the sudden transition.
Enhancing The Visuals
I passed an alpha texture to the shader as a uniform, then, I copied the alphatest_fragment from three.js Shader Chunks, which essentially just discards any pixels where the alpha value is below a given threshold.
Fake Ambient Occlusion
Fake Ambient Occlusion: I added two uniforms one for the base color of the grass and another for the tip color. We mix these two colors along the uv.y value, which gives us a smooth lerp of the base and tip color. Just adding a dark base color, drastically changes the appearance of the grass by faking “shadows” at the bottom.
Color Variation
When the number of grass instances is increased, however, the grass looks lifeless and bland. In order to add some variety, I used a noise texture to create a mix of two different tip colors.
Immediately, the grass looks more lush and alive!

Animation
Until now, the grass has been static. All changes have been limited to the fragment shader. To animate the grass, we need to use the vertex shader. I use a sine wave for the wind effect, and in order to make the movement less uniform, I added a scrolling noise texture to it.
Lighting and Shadows
Lighting and Shadows: As soon as I added the light shader chunks, I faced two issues:
1. The two faces of each grass card reacted differently to light.
2. Lighting and shadow calculation are some of the most expensive operations we can perform on our grass instances.
This immediately made it clear that I could not have more than one light in my project. To solve those two problems, I decided to have just one directional light in my project. I then copied the raw fragment chunks related to light and removed all the code until things broke. Upon simplifying it, I extracted the shadow value and used it to mix between the grass diffuseColor and a grass shadowColor. Although, this was far from ideal, it suited my purpose of achieving a Stylized Look.
Video Tutorial
Here are two short videos, I posted recently, explaining the process of creating Fluffy Grass.
I often post tutorials and mini-breakdowns on my socials. Information too small to make it into a full fledged article.
Conclusion
I also added three levels of graphics settings which would ensure that my project Elysium could run on all devices, including mobile phones. As a final touch, I passed the player position as a uniform to the shader to deform the grass as the player moves.
With that, we now have the fluffiest grass on the web! I hope this tutorial inspires you to push the boundaries of what’s possible!
P.S.: Hey! If you’ve made it this far, you might be interested in something exciting I’m working on. I’m building Mokubara—the simplest way to create stunning 3D mockups directly in your browser, no advanced 3D modeling or motion graphics skills required. If you’re a web designer or developer looking for an effortless way to bring your projects to life, check it out!


